| title | Migrate SQL Server to Azure SQL Database using the Data Migration Assistant | ||
|---|---|---|---|
| description | Learn how to use Data Migration Assistant to migrate an on-premises SQL Server to Azure SQL Database | ||
| author | rajeshsetlem | ||
| ms.author | rajpo | ||
| ms.date | 06/29/2020 | ||
| ms.prod | sql | ||
| ms.technology | dma | ||
| ms.topic | conceptual | ||
| ms.custom |
|
||
| helpviewer_keywords |
|
||
| keywords |
Migrate on-premises SQL Server or SQL Server on Azure VMs to Azure SQL Database using the Data Migration Assistant
The Data Migration Assistant provides seamless assessments of SQL Server on-premises and upgrades to later versions of SQL Server or migrations to SQL Server on Azure VMs or Azure SQL Database.
This article provides step-by-step instructions for migrating SQL Server on-premises to Azure SQL Database by using the Data Migration Assistant.
-
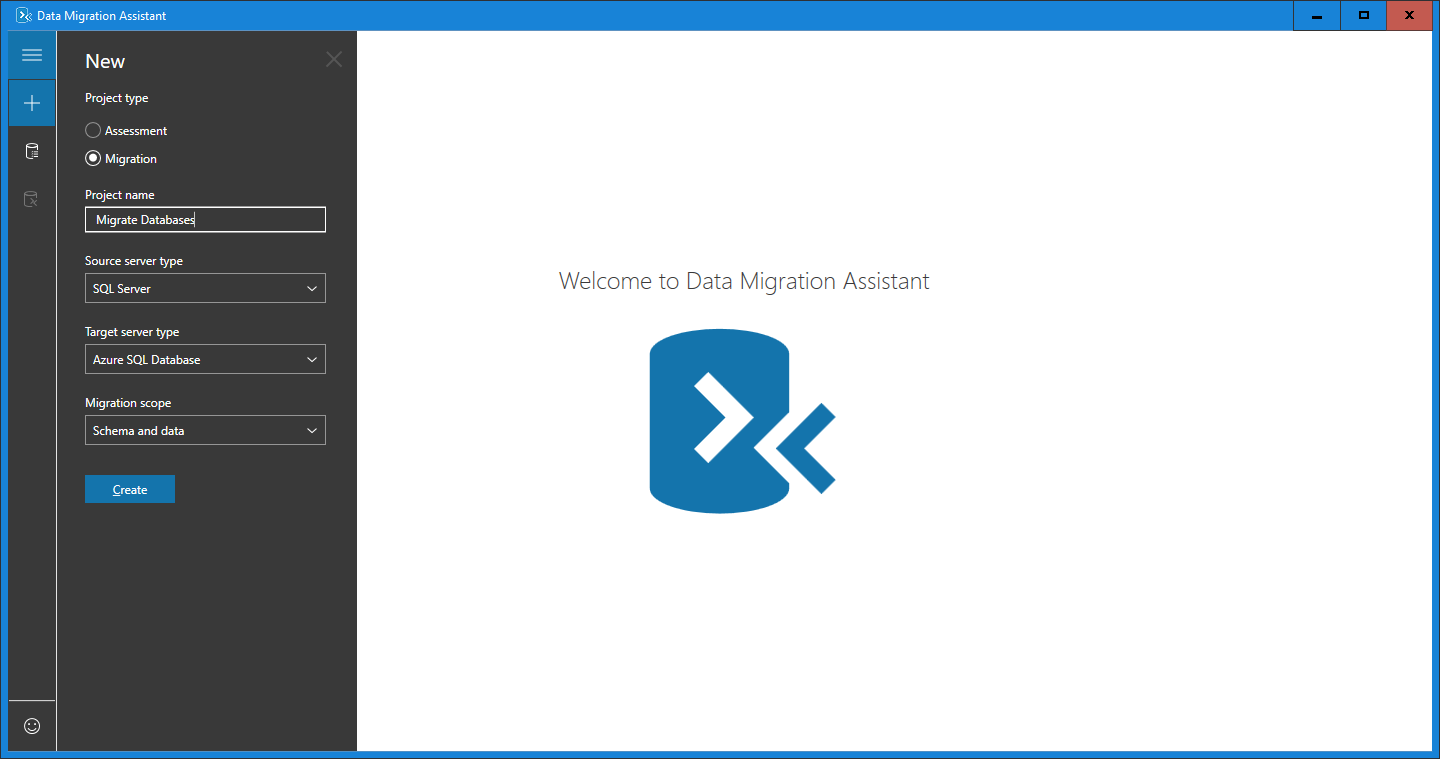
On the left pane, select New (+), and then select the Migration project type.
-
Set the source type to SQL Server and the target server type to Azure SQL Database.
-
Select Create.

-
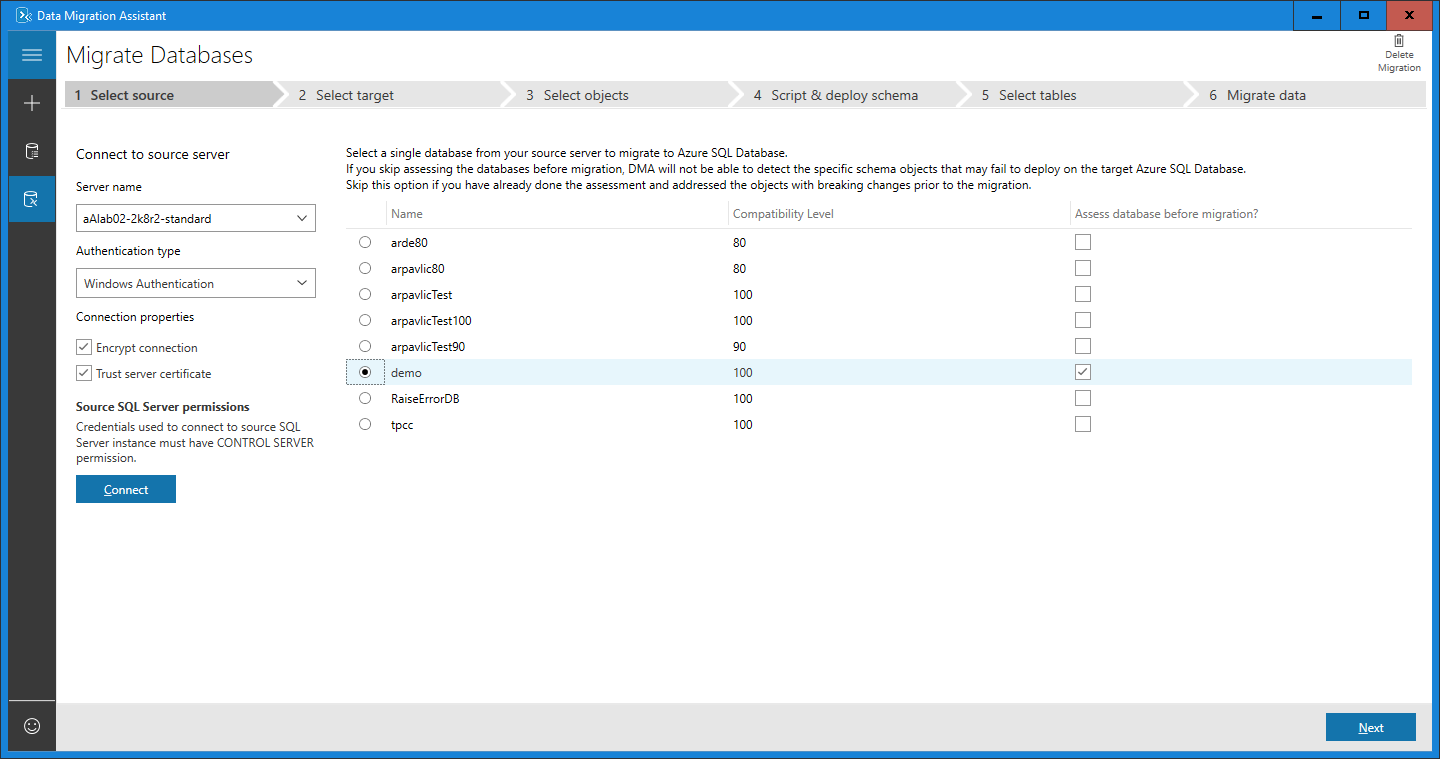
For the source, under Connect to source server, in the Server name text box, enter the name of the source SQL Server instance.
-
Select the Authentication type supported by the source SQL Server instance.
[!NOTE] It is recommended that you encrypt the connection by selecting the Encrypt connection check box under Connection poperties.

-
Select Connect.
-
Select a single source database to migrate to Azure SQL Database.
[!NOTE] If you would like to assess the database and view and apply recommended fixes before migration, select the Assess database before migration? check box.
-
Select Next.


-
For the target, under Connect to target server, in the Server name text box, enter the name of the Azure SQL Database instance.
-
Select the Authentication type supported by the target Azure SQL Database instance.
[!NOTE] It is recommended that you encrypt the connection by selecting the Encrypt connection check box under Connection poperties.

-
Select Connect.
-
Select a single target database to which to migrate.
[!NOTE] If you intend to migrate Windows users, in the Target external user domain name text box, make sure that the target external user domain name is specified correctly.

-
Select Next.


-
Select the schema objects from the source database that you want to migrate to Azure SQL Database.

[!NOTE] Some of the objects that cannot be converted as-is are presented with automatic fix opportunities. Clicking these objects on the left pane displays the suggested fixes on the right pane. Review the fixes and choose to either apply or ignore all changes, object by object. Note that applying or ignoring all changes for one object does not affect changes to other database objects. Statements that cannot be converted or automatically fixed are reproduced to the target database and commented.

-
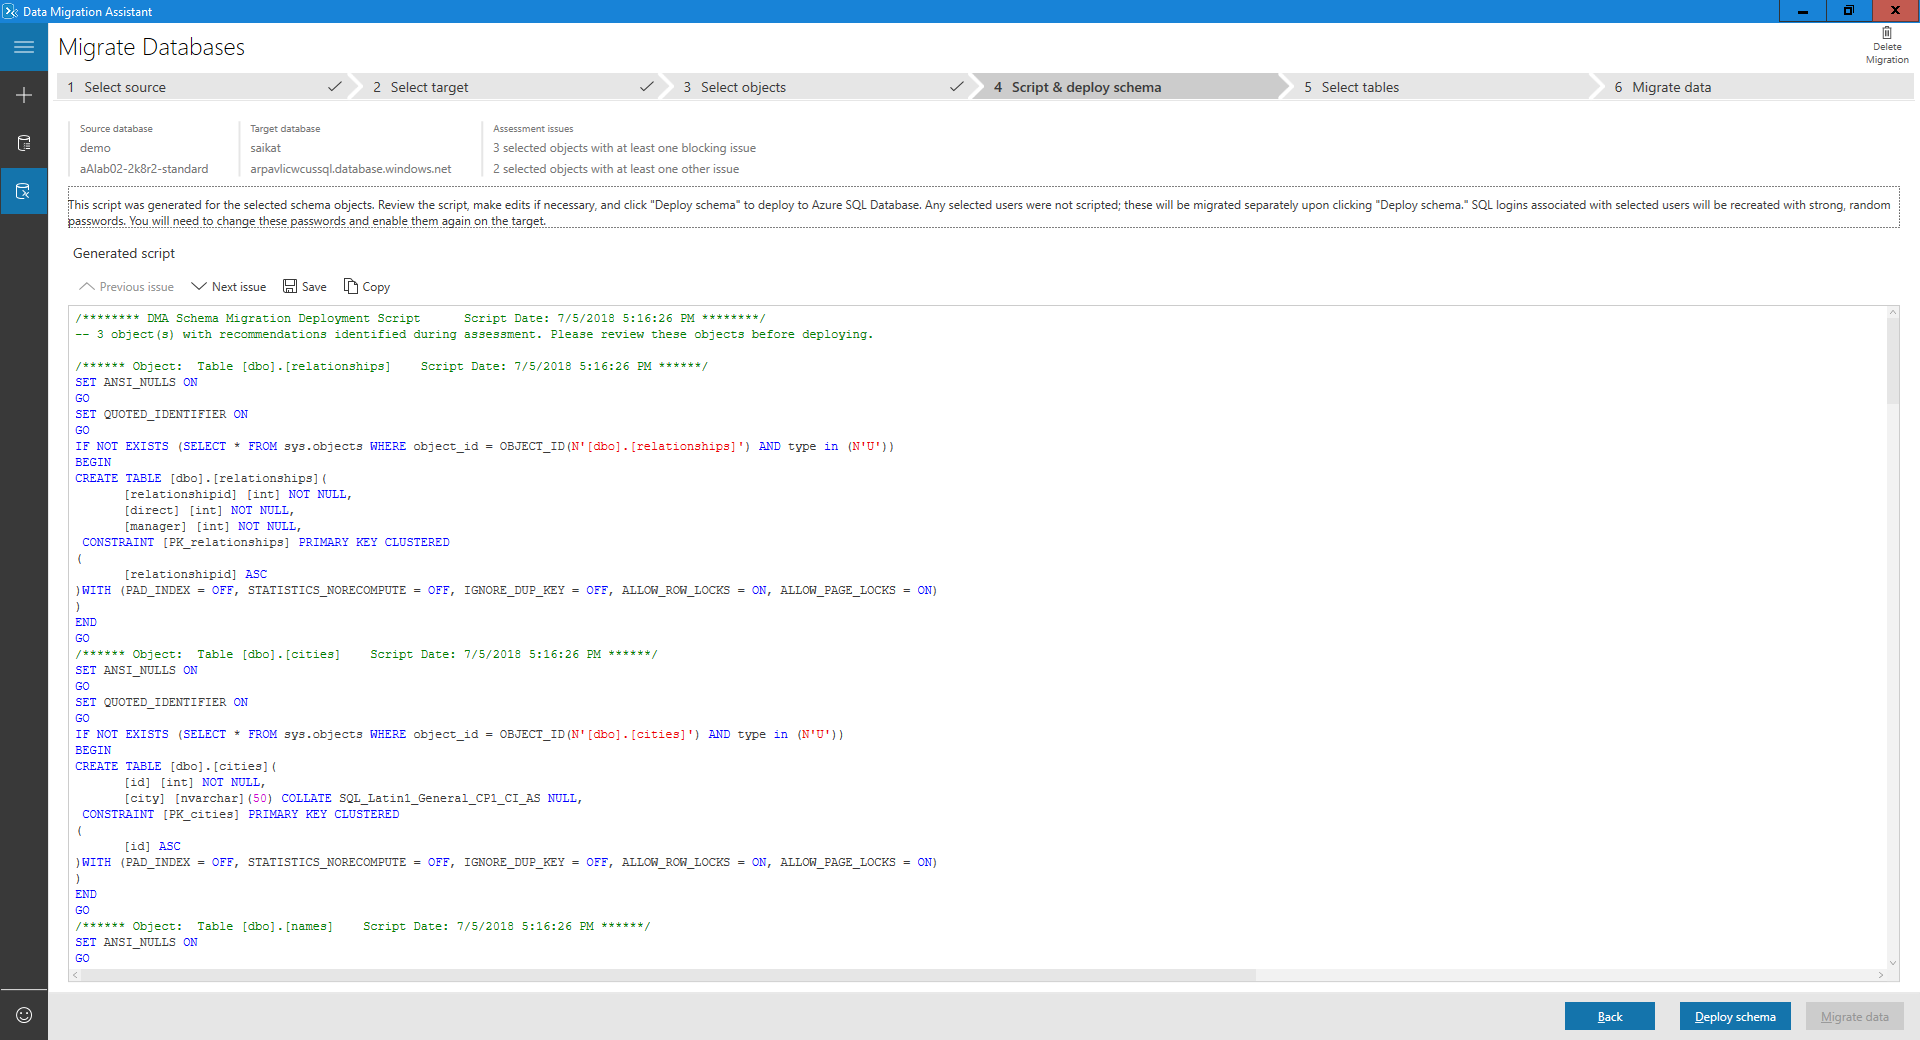
Select General SQL script.
-
Review the generated script.


-
Select Deploy schema.
-
Review the results of the schema deployment.

-
Select Migrate data to initiate the data migration process.
-
Select the tables with the data you want to migrate.

-
Select Start data migration.


The final screen shows the overall status.
