| title | Notebooks with SQL Kernel in Azure Data Studio |
|---|---|
| description | This tutorial shows how you can create and run a SQL Server notebook. |
| author | markingmyname |
| ms.author | maghan |
| ms.reviewer | mikeray, alayu |
| ms.topic | tutorial |
| ms.prod | azure-data-studio |
| ms.technology | |
| ms.custom | |
| ms.date | 03/30/2020 |
[!INCLUDESQL Server 2019]
This tutorial demonstrates how to create and run a notebook in Azure Data Studio using SQL Server.
- Azure Data Studio installed
- SQL Server installed
The following steps show how to create a notebook file in Azure Data Studio:
-
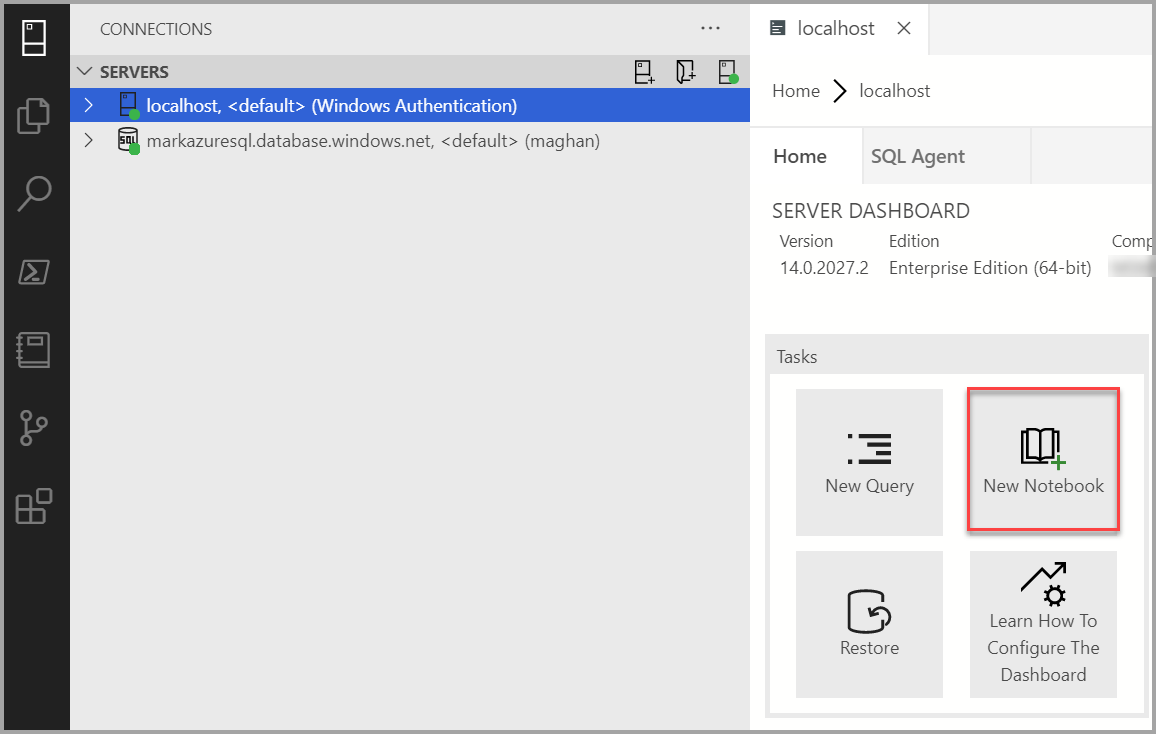
In Azure Data Studio, connect to your SQL Server.
-
Select under the Connections in the Servers window. Then select New Notebook.
-
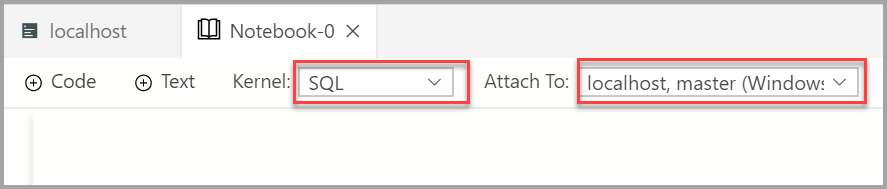
Wait for the Kernel and the target context (Attach to) to be populated. Confirm that the Kernel is set to SQL, and set Attach to for your SQL Server (in this case its localhost).


You can run each notebook cell by pressing the play button to the left of the cell. The results are shown in the notebook after the cell finishes running.
Add a new code cell by selecting the +Code command in the toolbar.

This example creates a new database.
USE master
GO

   -- Drop the database if it already exists
IF  EXISTS (
        SELECT name
        FROM sys.databases
        WHERE name = N'TestNotebookDB'
   )
DROP DATABASE TestNotebookDB
GO

-- Create the database
CREATE DATABASE TestNotebookDB
GO
If you run a script that returns a result, you can save that result in different formats.
- Save As CSV
- Save As Excel
- Save As JSON
- Save As XML
In this case, we return the result of PI.
SELECT PI() AS PI;
GO
Add a new text cell by selecting the +Text command in the toolbar.
The cell changes to edit mode and now type markdown and you can see the preview at the same time

Selecting outside the text cell shows the markdown text.

Learn more about notebooks: